Creating reports

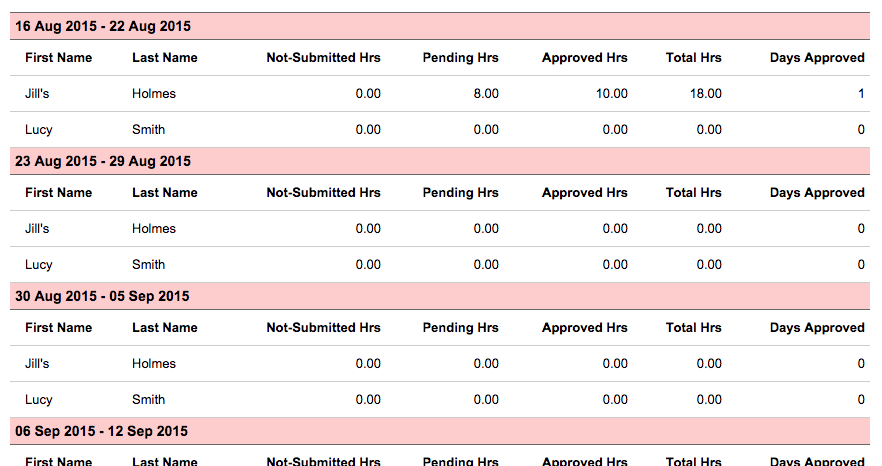
Click Reports in the dashboard. Fill out the form with the information you want to go into the report. Click View Report to get results.

Exporting report data

You can export a report into Excel (.csv) or Adobe PDF format. To export, click the appropriate export link in the report header area above your report data. Important: Make sure you have your popup blocker disabled.
export timesheet report

Editing invoices

Note: You can only edit invoices that are not marked Paid. If marked paid, you will have to change the status to “not paid” to make edits.

Change “Paid” status of invoice

To mark an invoice paid, view the invoice and click Mark Paid. To remove the paid status of an invoice, view the invoice and click Click Here in the “This invoice was marked paid on…” message box.

invoice status

Deleting an invoice

Viewing an invoice, click Delete this Invoice underneath the invoice. Then confirm by clicking Yes.

delete invoice

Invoice permissions

Sharing an invoice

You can share invoices with anyone with an email address. WeWorked will send them an email with a link to download the invoice. They do not even need a WeWorked account. Viewing an invoice, click Share then type in an email address. Separate multiple email addresses with commas.

share invoice

Click the X beside an email address to remove it and prevent that person from accessing the invoice.

Invoices Permissions

You can control who is allowed to manage invoices. Grant access to groups and people. If your account has the invoice upgrade, click Settings in the Dashboard. Then click Permissions. Add or remove groups and people by clicking either Groups or People. Check or uncheck groups or people. Then click Save.

Creating invoices

Invoices are populated with approved timesheet data from billable projects that have time charged against billable tasks.

Click Invoices in the dashboard. Then click New Invoice.

new invoice

Choose to start with a blank invoice or to populate the invoice with timesheet data.

When using timesheet data
Fill out the form with the information you want to go into the invoice. To get results, data must exist for the date range you enter and projects that you select. Click Save and Continue to create a new invoice.

Adding a line item

Right above the first line item, click Add Line. A new line item with a quantity of 1 will appear on the invoice.

add invoice line item

Removing a line item

Click the X to the left of the line item you want to remove. A message will appear asking if you are sure you want to remove the line item. Click Yes, remove row.

delete invoice line item

Administering Users

There are two types of users: Administrators and Regular Users.

Administrators

Administrators control user access and permissions and have complete control over the entire account. Administrators can change everything, which include projects, tasks, users, groups, leave policy, and all timesheets.

Regular Users

Regular users are allowed to submit time and update the personal information in their profile. Regular users may also approve time if an administrator grants them permission.

Important: The user that established the WeWorked account is considered the account owner and cannot be disabled. You must contact us to have this account owner disabled.

Adding Users

Click on Settings then Users. Click Invite People.

Fill out the information for the new user then click Add User. An invitation with sign-in instructions will be emailed to the email address provided. Users should check their junk/spam folder if they do not receive the email within 10 minutes.

Canceling User Invites

Users do not become fully activated until they sign in and change their password. Users that have never signed in are considered Pending Invites.

Resending User Invites

Click on Settings then Users. Looking at the pending invites section and the invitation you want to resend, hover your mouse over Invited then click Resend Invite.

resend invite

To cancel a pending invite, click Settings then Users. Looking at the pending invites section and the invitation you want to cancel, hover your mouse over Invited then click Cancel Invite.

Disabling Users

Users are never completely removed or deleted. Instead, users are disabled. To disable a user, Click on Settings then Users. Looking at the active users section and the user you want to disable, hover your mouse over Active then click Disable. Disabled users do not reduce your account’s available users.

Reactivating Users

Click on Settings then Users. Looking at the disabled users section and the user you want to reactivate, hover your mouse over Disabled then click Activate.

Managing Groups

Groups are a simple way to organize users. You can setup permissions so that a user is allowed to approve time for all the users in one or more groups.

Skip to add, rename, or delete a group.

Adding Groups

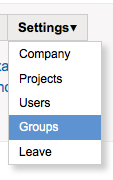
Click Settings in the dashboard. Then click Groups. Then click Add Group. Name your new group, select the members, then click Create Group.

go to groups

Editing Groups

On the line of the group you want to edit, click Edit.

edit group

Deleting Groups

On the line of the group you want to edit, click Edit. Then underneath the list of people, click Delete Group. Confirm that you wish to delete by answering Yes.


delete group

Configuring leave policies

Leave policies are the rules that govern how users accrue leave. You determine how many hours of a particular leave type users accrue and when the rule will start. The starting point is based on the users’ hire date. You can configure leave to accrue daily, weekly, monthly, or yearly. You can also apply a policy to a single person, multiple people, or all people.

There is also a feature to limit the total amount a user may accrue. And for companies with carry-over limits, you can set the maximum number of hours that a person may carry over into the new year. Annual carryover adjustments are made between midnight and 1:00 am EST on January 3rd to allow time for end of year timesheet approvals. The annual adjustment is based on approved time for the previous year. Negative leave balances are not adjusted. Accruals occur at midnight based on the timezone you set in your company profile.

Important: You must select Track Leave in a users profile to allow them to view their leave balances.  

Adding Leave Policies

Click Settings in the dashboard. Then click Leave. Looking at the leave policy section, click Add Leave Policy. Fill in the information then click Save. Assign people to the policy by clicking Assignments beside the leave policy. Select the people and click Save.

add leave policy

Editing Leave Policies

Click the name of the leave policy to make edits.

edit leave policy

Delete Leave Policies

Click the name of the leave policy then select Delete this leave policy.  Confirm the deletion to remove the policy.

delete leave policy

Creating billable projects

Projects are either billable or non-billable.  Billable projects have an invoice method of Task Hourly Rate, Person Hourly Rate, or Fixed Project Hourly Rate.

Make A Project Billable

Go into a project and then looking at the Project Overview section click Edit.  Beside Billable Project check Yes.  Then beside Invoice Method choose how you intend to invoice the client.

billable project

You must configure billable projects as follows:

If project is billed by… You must set…
Task Hourly Rate Set the billable tasks hourly rates
Person Hourly Rate Set the users hourly rate
Fixed Project Hourly Rate Set the project’s hourly rate

invoice methods

Invoice by Task Hourly Rate

Go into a project and edit the Project Overview section. Change Invoice Method to Task Hourly Rate then click Update Project.  Create one or more billable tasks and set their hourly rate.

Invoice By Person Hourly Rate

Go into a project and edit the Project Overview section. Change Invoice Method to Person Hourly Rate then click Update Project.  Edit a user’s Profile by adding an Hourly Rate to user’s profile.

Invoice By Fixed Project Hourly Rate

Go into a project and edit the Project Overview section. Change Invoice Method to Fixed Project Hourly Rate then click Update Project.  Fill in Project Hourly Rate then click Update Project.

Reviewing Timesheets

You can only review time for the users for which you have rights to review. The review link will display No Time Pending or Review Pending (means there is time for you to review). Click the link in the dashboard.

timesheet dashboard

The review area will default the time period to the previous 30 days and weekly pending time. Adjust your filters as needed then click View Timesheets. You can then click on the row of the results to jump to a person’s timesheet to take action (such as approve or deny time) on their timesheet. The results will only include users that you can review.

Review Options

You have two options when reviewing timesheets: 1) Quick Review or 2) Detailed Review. Quick Review allows you to approve or deny timesheets from a single screen without having to enter each user’s timesheet. From the review area, click on a row with pending time to display the task details and review options. Choose to Approve or Deny.

Use the Detailed Review option when you need to view a person’s entire timesheet, looking for items like weekly and daily comments and leave approvals. From the review area, on a row with pending time, click the name of the person to enter their timesheet. You can also click on the row then the specific date to jump to the person’s timesheet with the date.

Approving Timesheets

Go into the timesheet that has time pending approval and click Approve right below the dashboard. You will see one or more of the following options:

  • This Week – displays when all the days of the week are in a status of Pending Review.
  • This Week and Next Week – displays when all the days of the week and the next week are in a status of Pending Review.
  • Last Week and This Week – displays when all the days of the week and the previous week are in a status of Pending Review.
  • Semi-Monthly – displays when all the days between the 1st and 15th or 16th and end of month are in a status of Pending Review. The first day of the week will determine which period displays. Ex. To approve the 16th through the end of the month, the first day of the week must fall on or after the 16th.
  • Select Days – displays for all the available days that are in a status of Pending Review.

Denying Timesheets

Go into the timesheet that is pending approval and click Deny right below the dashboard. You will see one or more of the following options:

  • This Week – displays when all the days of the week are in a status of Pending Review or Approved.
  • This Week and Next Week – displays when all the days of the week and the next week are in a status of Pending Review or Approved.
  • Last Week and This Week – displays when all the days of the week and the previous week are in a status of Pending Review or Approved.
  • Semi-Monthly – displays when all the days between the 1st and 15th or 16th and end of month are in a status of Pending Review or Approved. The first day of the week will determine which period displays. Ex. To approve the 16th through the end of the month, the first day of the week must fall on or after the 16th.
  • Select Days – displays for all the available days that are in a status of Pending Review or Approved

Type why you are denying the timesheet then click Deny Timesheet. An email with the comment entered will go to the person whose timesheet is getting denied.

deny timesheet

Completing timesheets

You can access your timesheet by clicking Timesheet under your name in the Dashboard.  

Entering Time

You enter time in WeWorked according to task.  Each row on the timesheet represents a task.  Before you can start entering time, you must first add a row to your timesheet.

Time Format

You can enter time in two ways: Time Format (9:45) or Decimal Format (9:75). WeWorked always displays time in decimal format. If you enter time in time format, WeWorked will automatically convert it to decimal format. You can also just enter decimal format. Decimal format is calculated by dividing the minutes by 60. For example, 1 hr and 50 min is 1.83, which is 50/60 = .83 for the minutes.

Example time entries:

Description Time Format Decimal Format
1 hr 15 min 1:15 1.25
2 hr 30 min 2:30 2.50
3 hr 45 min 3:45 3.75

Adding a Row

If no rows have been added to the timesheet, click Add a row in the middle of the timesheet. add timesheet row

If you already have a row on the timesheet, click Add row to timesheet above the date range display on the timesheet.

add another timesheet row

Select a Project from the drop down list then select a Task. A row for that task will be added to the timesheet. You can now start entering time for the task.  Changes are automatically saved as they are entered.

select task timesheet

timesheet row

Removing a Row

Click the X beside the row that you want to remove. A message will appear asking if you are sure you want to remove the row. Click Yes, remove row. You will not be able to remove rows that have days Pending Review or are Approved.

remove timesheet row

Submitting Time for Approval

Click Submit for approval right below the dashboard. You will see one or more of the following options:

  • This Week – displays when all the days of the week are in a status of not-submitted.
  • This Week and Next Week – displays when all the days of the week and the next week are in a status of Not Submitted.
  • Last Week and This Week – displays when all the days of the week and the previous week are in a status of Not Submitted.
  • Semi-Monthly – displays when all the days between the 1st and 15th or 16th and end of month are in a status of Not Submitted. The first day of the week will determine which period displays. Ex. To approve the 16th through the end of the month, the first day of the week must fall on or after the 16th.
  • Select Days – displays for all the available days that are in a status of Not Submitted.

Select a person to send an email notification or select -no person- to avoid sending an email. Whenever you elect to submit multiple weeks, a pop up will appear displaying a summary of the time for the entire period. A message will appear asking if you are sure you want to submit the timesheet for approval.  Click Yes, submit for approval.

submitoptions

timesheet pending approval

Important: Days and all rows are locked once they are submitted for approval.  A star will be next to the date for each day pending. A user with rights to approve the timesheet will have to deny the days to unlock.

Jumping to a Date

You can quickly jump to date by clicking the calendar icon calendar icon beside the date range of the timesheet.  You can also click Back to go back one week and click Forward to go forward one week.

navigating timesheet

Adding Comments

Type your comment in the comment box then click Add Comment.

adding a comment

Important: Comments cannot be deleted.

Printing Timesheets

Click Print timesheet near the date range of the timesheet. A printer-friendly version of the timesheet will open in a new window so you can print it.

print timesheet